
From concept to product
From prototyping to production, our production sites can handle all your manufacturing projects.
Laser engraving and marking: which finishes survive it?
The short answer
A laser marks metal in one of four ways: annealing, which darkens stainless without removing metal; white marking on anodised aluminium and dark coatings; ablation, which burns away paint or powder to reveal the metal; and deep engraving, a fibre-laser recess of 0.05 to 0.5 millimetres. Bare stainless and anodised aluminium survive best.
Two lasers, two jobs
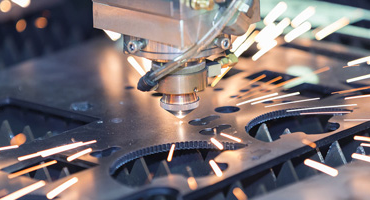
The first decision is not the artwork, it is the light source, and the two common types do different things. A fibre laser at about 1,064 nanometres is absorbed well by metals and is the tool for marking bare stainless steel, aluminium, titanium, brass and copper; a carbon dioxide laser at about 10,600 nanometres is absorbed poorly by bare metal but strongly by organic coatings, so it marks wood, acrylic and, crucially, paints and powders. This is why a coated metal part can often be marked on a low-cost CO2 machine while an identical bare steel part cannot: the beam is interacting with the coating, not the steel. A third family, diode lasers at roughly 450 nanometres, belongs to the same rule, producing good contrast on anodised aluminium and coated metal but leaving bare metal essentially unmarked.
The four marking methods and how deep they go
Fibre lasers produce marks in three ways depending on power and speed. Annealing heats the surface just enough to grow a thin oxide layer, which reads as a black or dark grey mark with no depth at all and a completely smooth feel; it is the preferred method on stainless steel because it does not break the passive layer, and it suits hygiene-critical parts where a recess could trap residue. White marking briefly melts the very top of the surface and works best on black anodised aluminium and dark coatings where a light mark is required. Deep engraving actually removes material to create a tactile recess of 0.05 to 0.5 millimetres, which is the only mark that survives abrasive blasting, heavy wear or a subsequent coating; it is slower and costs more, so it is reserved for nameplates, tooling and permanent traceability. On coated metal the CO2 laser adds a fourth behaviour, ablating the coating so the base metal shows through and provides the contrast.

Which finishes survive a mark
Almost every finish can be marked, but each one reacts differently. Bare stainless steel takes a clean annealed black mark that is permanent and adds nothing to the surface. Anodised aluminium gives the highest contrast, a white or light mark on a dark background, because the laser removes the dyed anodic layer; the trade is that the exposed aluminium underneath is no longer protected, so a severe service environment may call for a clear coat over the mark. Powder coating and wet paint are ablated, revealing bright metal against the colour, which produces excellent contrast but destroys the coating in the marked area, and a thick powder film will simply bury a shallow etch rather than reveal anything. Plated surfaces such as zinc are the most delicate case, because the coating is thin and a heavy pass can burn through to the substrate, so marking them needs low power and careful framing. Copper and brass absorb poorly at the wavelengths used and reflect the beam, so they need a fibre source with the right focus parameters rather than a generic job.

| Finish | Method | Depth | Main risk |
|---|---|---|---|
| Bare stainless | fibre, annealing | none | Corrosion at a deep etch unless re-passivated |
| Anodised aluminium | fibre, oxide removal | to the oxide base | Exposed aluminium needs a clear coat in harsh service |
| Powder coating | CO2 or fibre, ablation | through the film | Marking area loses its protection; thick powder hides shallow marks |
| Wet paint | CO2 or fibre, ablation | through the film | Same as powder, with a thinner film to burn through |
| Zinc plating | light pass, low power | surface only | Thin coating can burn through to bare steel |
| Any, for traceability | fibre, deep engraving | 0.05 to 0.5 mm | Longest cycle time and the highest cost per part |
Order of operations decides legibility
Most marking failures are sequencing mistakes rather than laser problems. Marking stainless steel before anodising or coating seals the mark under the finish, which reduces contrast and can leave it invisible; marking after gives strong contrast but leaves the mark exposed. Abrasive blasting will erase any shallow etch, so a part that is blasted for weld clean-up has to be deep-engraved before the blasting, not after. A powder coat of 60 to 120 microns completely buries a shallow etch, so the routing must either mark after coating or specify a deep engrave before it. And on stainless steel, any process that removes metal exposes fresh iron, which is exactly what causes rust, so marking should be followed by passivation to restore the oxide layer. Getting the sequence right in the routing costs nothing; getting it wrong means scrapping a finished batch.

Where marking fails
Four conditions produce a mark that does not survive or does not read. High-reflectivity metals such as copper and brass can reflect the beam back into the optics, which damages the machine and produces a weak mark, so they need proven parameters rather than a generic program. A tracking code needs background contrast and a quiet zone, and on raw or polished metal glare defeats both, so codes belong on a matte or blasted area. Repeated industrial cleaning and chemical washdowns degrade low-contrast marks over time, which is why serial numbers on hygienic equipment are annealed or deeply engraved. And any mark placed where a recess can trap product, bacteria or moisture is a hygiene and corrosion liability, so on food and medical parts the mark is usually kept smooth and shallow rather than deep.
What to put on the drawing
A marking callout should name the method rather than the word engrave alone, because the four methods produce different looks and different depth. State the required contrast, the depth where the mark must be tactile or must survive abrasion, the location and the quiet zone for any code, and the sequence relative to anodising, coating, blasting and passivation. If the mark is on a coated part, say explicitly whether the coating may be removed in the marked area, because ablation always removes it locally. Every figure here is a planning range for common industrial lasers, and the result a given machine produces depends on the finish, the coating chemistry and the settings, so the number that settles a job is a test mark on a sample of the actual finished part.
See surface finishing for the finishes we apply before marking, metal stamping for the tags and nameplates that carry permanent marks, and sheet metal fabrication for marked enclosures and panels.
Scope and sources. The distinction between coating removal on powder-coated parts and direct bare-metal marking, the list of coated metals a CO2 laser can process, and the note that an unknown coating should not be assumed suitable come from a note on CO2 laser engraving of metal. The three fibre methods of annealing, white marking and deep engraving, the 0.05 to 0.5 millimetre depth of a deep engrave, the material-by-material behaviour of stainless, anodised aluminium and coated metal, and the recommendation to ask for the method by name come from a comparison of laser engraving on metal and non-metal. The order-of-operations rules for powder coating, anodising, blasting and passivation, the note that engraving stainless steel breaks the chromium oxide layer and requires passivation afterwards, and the requirements for scannable serial, batch, QR and Data Matrix codes come from a note on laser etching against engraving for sheet metal. The behaviour of diode lasers on anodised and coated metal and the limitations on bare metal come from a note on diode lasers and coated surfaces. These are planning ranges; the mark on a specific part should be confirmed by a test on the finished item.
Are you looking for a reliable manufacturer of down home textile products?
We can quickly provide customers with market analysis, technical support and customized services.From concept to product
From prototyping to production, our production sites can handle all your manufacturing projects.
subscription